So I’ve been getting a lot of questions on how I did this manicure:

The method for this manicure is called Water Marbling. Here is a photo tutorial that will hopefully help you all out! There are tons of videos available on youtube, but I know some had more detailed questions so feel free to leave anything I don’t cover in the comments or email me :) [Try not to ask anonymously so you know I got back to you!]
This is kind of long but really informative!
What you’ll need for this manicure:
- Nail Polish :)
- I used the following eyeslipsface polishes for this manicure:
- Smoky Brown
- Nude
- Lilac
- Tape or Vaseline
- Small cup or bowl
- Room temperature water
- Orange sticks or toothpick
- Paper towel
- Qtips & Nail Polish Remover (for clean up)
KEEP READING FOR REST OF TUTORIAL! :)
Step 1 - Set up your work station
- You will want to work on a hard surface (a desk or table is ideal)
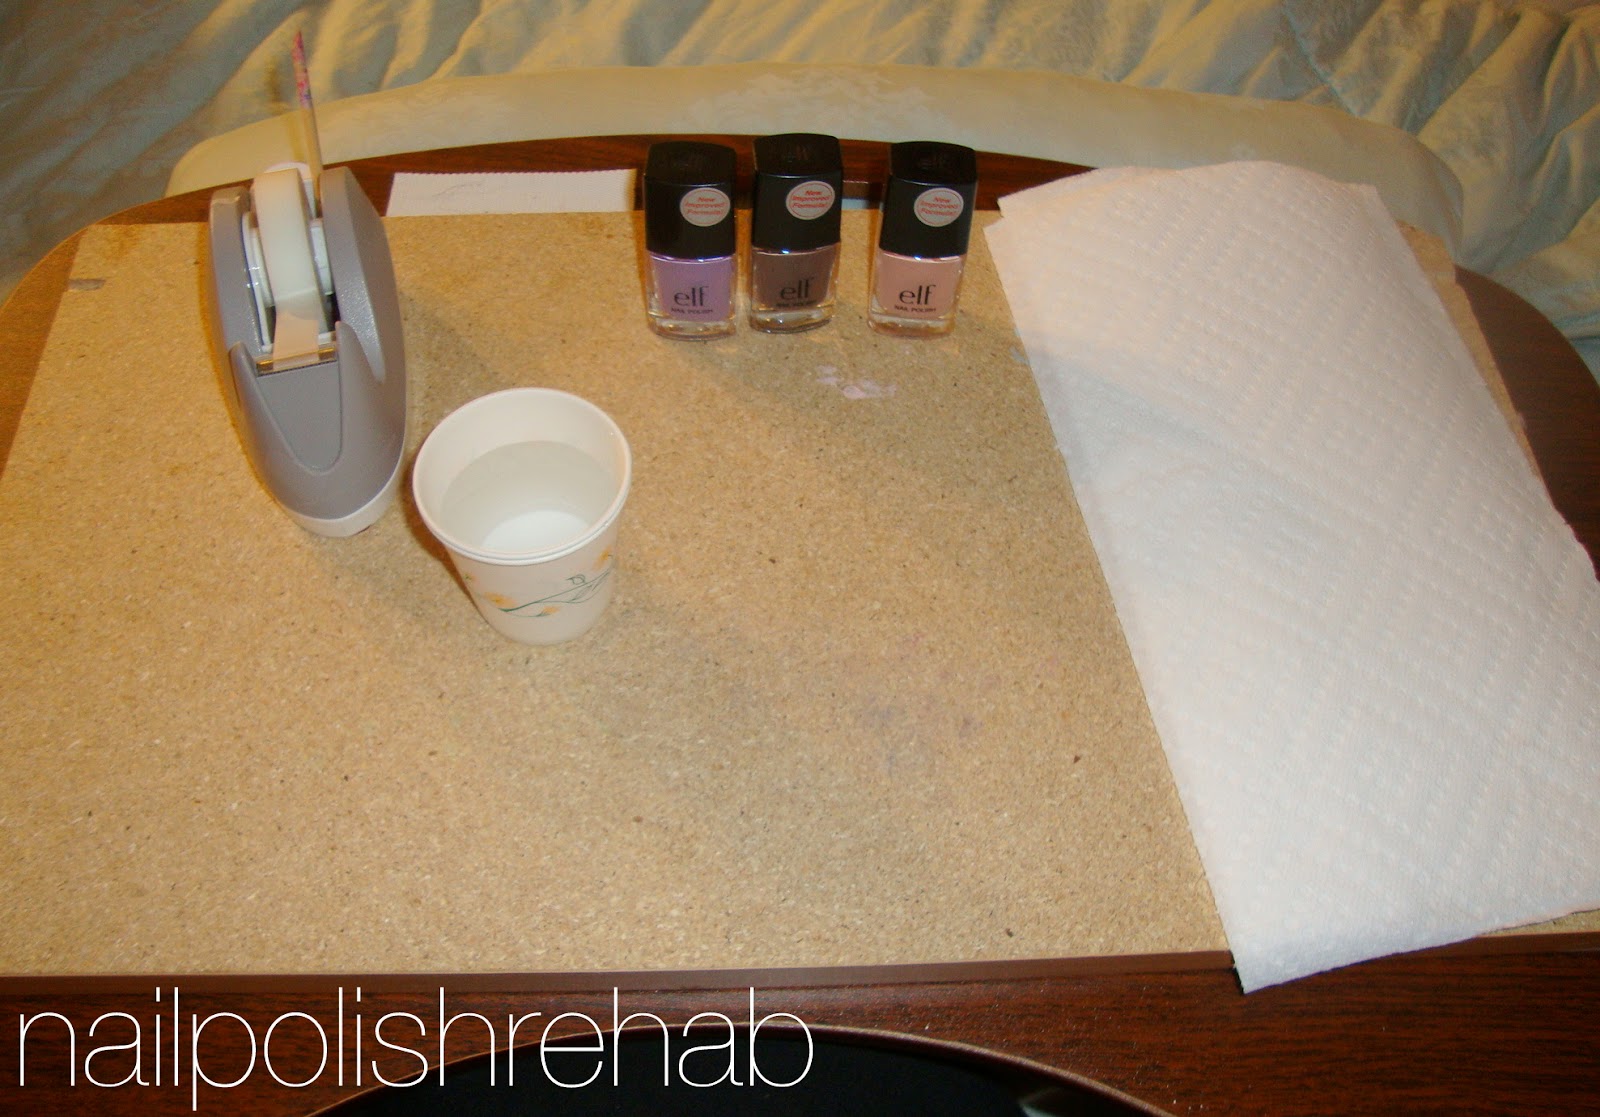
It’s hard to see but my orange stick is sticking out of my tape dispenser.
When choosing what kind of cup you use, make sure it is something you do not want to use again! You want whatever you are using to have a small radius so you don’t waste too much nail polish. I use a paper dixie cup, I think real people use them in bathrooms? We use them to make jello shots.

Here’s a close up of the cup. Sometimes I stack two just in case the water bleeds through and makes the cup flimsy. Try to use room temp water. If its too cold the polish won’t spread well, and if it’s too hot the polish tends to spread too much. Usually I use a water bottle I left on my desk for a few days or something like that.
Step 2: Base Coat

I used Sally Hansen Complete Salon Manicure in Pink Slip.
Any color will work as your base coat, but try to stick to light colors. It tends to brighten your marble and if you miss a spot when you are marbling then your base coat shows through rather than your bare nail. Usually I use white, but I left that at my house over Thanksgiving.
** You should also use an actual base coat under your color. I prefer Seche Clear or Essie Grow Stronger!
** Let your base coat fully dry before moving on! **
STEP 3 - Taping off your fingers (or vaseline)
This is really important! So you are going to be sticking your fingers in a cup of nail polish so obviously you don’t want it to get all over your fingers. To avoid that you either can tape off your skin or put vaseline on your finger (avoiding your nail!).
Fingers look weird with tape all over them so don’t judge haha
Here are some pictures with the tape:
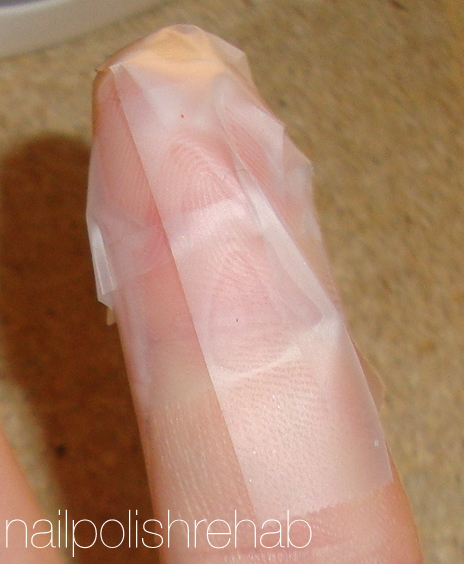


Okay so a few things on taping.
I swear tape is magnetically attracted to nail polish. Make sure the tape doesn’t touch your nail, if it does bye-bye base coat. There is nothing worse than finishing your base coat and then having to redo a nail because tape got to it. And then you get cotton on your other nails and you end up having to take off all your polish and start over. Ugh. I know… I’m so dramatic.
I tape off one hand at a time. I like to have one full hand taped so I can decide which nail to marble when I look at the design. (I’ll get to that) Sometimes it helps to rip off the tape before you do your base coat and place them on the edge of your desk.
You will notice there are patches where skin is showing. The main goal is avoiding nail polish all over your fingers. A little out of the edges is pretty easy to clean up with nail polish remover. That’s where the q-tips come in.
I usually use around 3 pieces of tape per finger.
I can do another post with better pictures on taping if that’s helpful. Just let me know!
STEP 4 - Dripping the nail polish
** Unscrew your polishes, leaving the caps on all of the bottles. Easier access.
In order to get the nail polish in the water, you take the brush and place it over the water and let it drip once into the water. The polish spreads out and forms a ring. You then take your next color and do the same thing.
Always place your brush over the center of the previous ring. It’s like making a bullseye.
Here are a bunch of pictures. More tips after the pictures!


 |
| This is what the brush should look like as the plish drips into the water |


Here are a few additional tips
- Don’t hold your brush too high. This will make the polish sink to the bottom.
- Don’t hold your brush too low. You don’t want your brush to touch the surface of the water.
- Avoid shaking your brush. Sometimes it helps to tap the brush to make the polish drip faster, but you don’t want to end up shifting your brush too much. If you move around too much, the drop of polish may not go in the center of your ring.
- Usually around 10 rings will do the job. Your final ring should be fairly small. The size of an eraser is about the size you are looking for.
- WORK QUICKLY. You don’t want the rings to sit too long. Other wise the polish will dry and form a film and you won’t be able to make a design. That’s why unscrewing all the caps ahead of time helps.
- Don’t put too much polish on your brush. You want to work quickly so more polish means it will drop faster, but if the brush is too loaded it will just make a mess and your droplet of polish will probably ruin your other rings.
STEP 5 - Making the design
With your orange stick or toothpick, lightly drag across your design.
Wipe your orange stick off on the paper towel after each drag.


When dragging your orange stick, think of the first two rings as an anchor. If you pull on the anchor rings, it will break your circle and ruin your design. All the color will end up blending together so work with your inner rings.
If you are dragging outwards like in some of the photos above and you land on an anchor ring, try to drag your stick to the cups edge and pull it out with your stick pressed against the side of the cup. Sorry if that doesn’t make much sense.
I don’t really have any particular method to making the design. I just drag and stop when I find a design I like. When you find a design you like move on to the next step!
STEP 6 - Dunking your finger
I didn’t really get any pictures of this part. It was too difficult to manage the camera. Sorry!!
- Bend your finger so your nail is parallel with the water.
- DO NOT DUNK YOUR FINGER STRAIGHT DOWN.
- When your nail is positioned over the design you like, unbend your finger. Kind of like you are flicking the water.
- DO NOT TAKE YOUR FINGER OUT OF THE WATER.
- Make sure you don’t dunk your finger past the tape. It’s not a big deal if you do, it just makes clean up a little more time consuming.
- With your finger in the water, take your orange stick and collect the nail polish that is on the surface. The polish creates a film and will cling to the stick when you swirl it around.
- Once there is no leftover polish residue, you can take your finger out of the water.

This is your end result. I shake my hand usually to get off any excess water so it doesn’t leave an indentation on the design. If you end up with some small air bubbles, either try lightly poking them with the pointed side of your orange stick or blowing on them.. or leaving them alone.
You can choose to take the tape off all at once or after each design. I usually take it off after each design because the feeling of tape is annoying and dries out my skin.

Just repeat the process for each nail :)
Here was the end result before clean up.

Notice there were a few bald spots where the Pink Slip is visible. This happens when your tape lifts or is too close to your nail. If it really irritates you, you can use a thin nail art brush and touch it up with one of the colors. I usually just let it go and ignore it.
Now just go around your cuticles with a q-tip dipped in nail polish remover. It should come off fairly easy.
In all honesty, I wasn’t a big fan of this color combination so I ended up taking it off before I did the other hand and did a pink one instead. I wanted something winter/fall-ish but it just wasn’t working for me.
I’ll post my pink one in a little bit. :)
Finally, end with your favorite top coat (Seche Vite) and you have yourself a water marbled manicure!
If you have any questions at all feel free to leave a comment or send me an email: nailpolish.rehab@gmail.com Hope this helped some of you out!!
xo Holly
No comments:
Post a Comment
Thank you for leaving a comment! I love hearing from all of you and appreciate all the feedback!
If you have any questions feel free to ask here! I'll try to respond quickly!